November 29, 2014
Oregon – Five Before and After Images
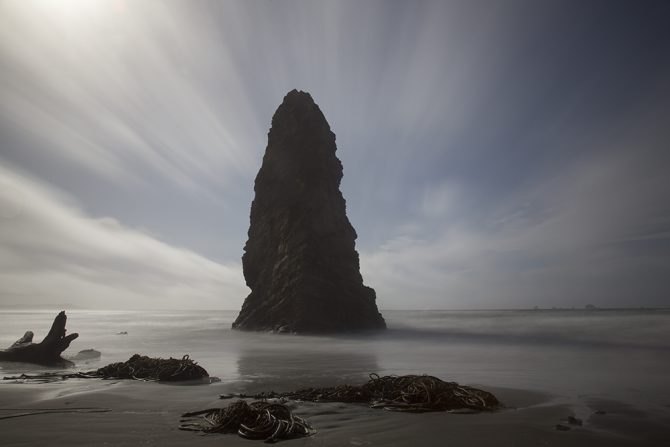
Monolith No. 78 – Before
I’ve had a number of people ask if I’d do some more “before and after” shots. So here are five from my recent Oregon trip.
~~~~~
I had my eye on this Monolith by Cape Blanco for several years, but I had never found an easy way to get down to the beach. On this trip I found one.
At the hour I get there (never early!) the monolith is backlit and so it’s a difficult shot. I was fortunate to have these great delicate clouds that streak well with a long exposure and I envisioned them becoming an important part of the image, if I could deal with the backlight.
The sun was in the upper left corner and it was washing out the clouds and giving me a big flare. I used my hand as a sunshade for the 30 second exposure, properly placing it by watching where my hand’s shadow fell on the lens. I knew that later in Photoshop I’d have to even out the sky, because it was bright on the left and darker on the right.
Then there was the debris on the beach from the last few days of big storms and high tides, but I knew that I could deal with that in post processing.

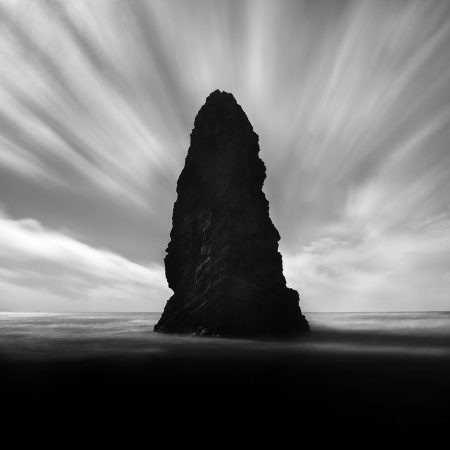
Monolith No. 78 – After
To deal with the debris I cloned out the tree stump and burned down the foreground to remove the rest. I don’t like anything that distracts from the main subject.
For the sky I burned down the upper left corner to bring out detail in the clouds, then I dodged up the right to balance the sky out. I also used a very small dodging brush to follow the cloud streaks to bring them out more. Adding contrast also helped the clouds stand out against the sky.
The backlighting didn’t hurt me as much as I feared it would. There’s not much shadow detail in the Monolith, but I generally don’t prefer a lot anyway.
Monolith No. 77 – Before
This is one of my favorite images from this trip. I envisioned this Monolith framed by the very dark hills on the sides, the rocks below and the clouds above.
This was a pretty simple image and an easy one…I thought…until I got home and found out that my Vari-ND was doing the dark pattern thing on me. It’s one of the quirks of all variable ND filters, sometimes at wide angles and when the sun angle is just right, you get these weird dark patterns across the image. And here’s a heads up: the cheaper the variable ND filter the more it will do this. That’s why I use the Singh-Ray Vari-ND, it happens much less frequently and when it does, there are a couple of workarounds.
If I had noticed the patterning in the field I could have switched lens and probably have avoided it. This was shot with my 24-105 at 24 mm, which is where the problem can happen, when you’re shooting at the wide end of your lens. If I had switched to the 16-35 and used 24 mm the pattern probably would have gone away, because 24 mm is mid focal length for that lens. And of course another option would have been to simply switch to a fixed ND filter for this shot.
This image also had some vignetting in the corners and I didn’t like how the clouds were thin on the right side of the image.
You might notice that I underexpose my images, usually by about 1 stop. I do this for a couple of reasons. First, I like the look of a dark image with pronounced highlights. Second, it makes it easier to deal with the wide dynamic range in these types of scenes where the sky is important to the image. If I had opened up another stop, that sky would have easily washed out and I’d have lost the cloud detail. Shadow detail is not very important to my images, so underexposing works for me.

Monolith No. 77 – After
I fixed the dark pattern in the sky with vey some careful and slow dodging (it’s easy for a sky to look blotchy if you use a small or hard brush or you work too quickly) I’m typically dodging and burning between 1-3% strength and for skies I’m generally using 1%. I used the clone tool to fix the vignetting and I also cloned in some clouds from the left to the right for a more balanced look.
I also used dodging and burning to bring out the water detail. I call it local contrast enhancement when I go back and forth between burning and dodging to increase the contrast in just one area.
I was happy with how this image turned out, especially after finding out about the dark pattern in the sky.
Something I noticed in the image above: there’s a thin highlight separating the sky from the monolith. I went back to the original TIFF and it’s not there, but it appears when I convert it to a JPEG for the web. I’ll have to do some work to figure out what that is and how to fix it.
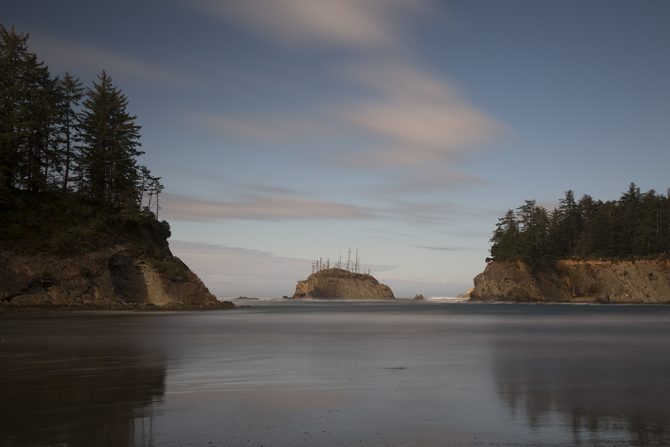
Cape Blanco – Before
People are naturally drawn to lighthouses, as are photographers. But the lighthouse shot is soooooo overdone that I almost didn’t create this one. But I thought I’d see if I could put my twist on it. I love to put the subject small in a large frame and then added a long exposure for a bit of movement. I underexposed and used a polarizer because I wanted black skies.

Cape Blanco – After
In the final image, I further isolated the lighthouse by burning down the foreground and the sky. Looking at this image now, a few weeks after I last worked on it, I think I’ll remove those trees on the far right because I find them distracting.

This illustrates how I work to refine an image. I’ll let it sit for a few weeks and then look at it with fresher eyes. I’ll then perhaps modify it again and then put it to bed for a few weeks more before I look at it again.
Now that I’ve removed those trees, I’ll come back in a week to see if I want to keep this change or not.
Isolated No. 7 – Before
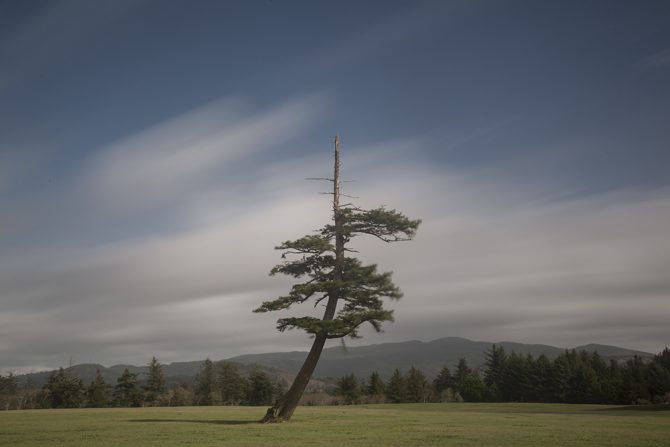
I was driving on the road to Cape Blanco when this tree just jumped out at me! I love centered images and struggled if I should center the tree where it hits the ground or the upright of the tree. Centering the upright portion of the tree looked more centered and that’s what I went with.
It was a windy and hazy day which made the shot a little challenging. I took about 20 long exposures trying to get the clouds just right and ended up using this one. I didn’t underexpose as I usually do, because I didn’t want to lose the tree detail. It was still a processing challenge and I started over 4 times before I got it right.
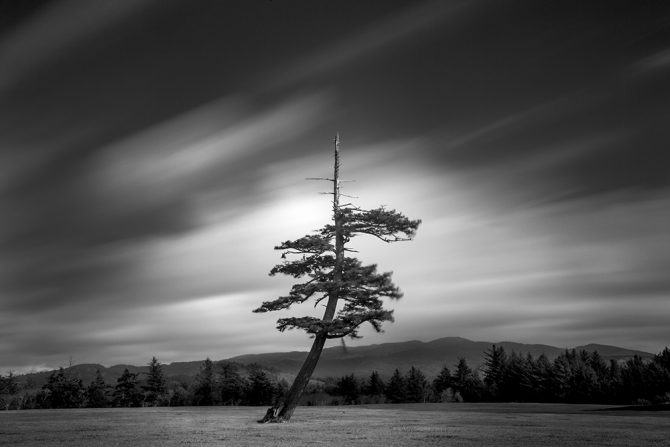

Isolated No. 7 – After
Again, I did a lot of dodging and burning on this image. Many people feel that they can do this with a mouse, but I certain cannot! I use a pen and tablet and the control is so much better than with a mouse. I never like to be adamant, but you cannot do what I do with a mouse. Period.
I got rid of the shadow of the tree, that bothered me for some reason, and left a highlight around the tree. I darkened the sky and left it bright behind the tree. As I look at the image today, I think that I may go back and open up the trees a bit on the right side.
As I make decisions about my images, it reminds me of how I’ve seen some others make those decisions. They will show the image to someone and say: What do you think I should do to this image? I am very opposed to that approach, I think one should have a Vision and not adulterate it with someone else’s opinion.
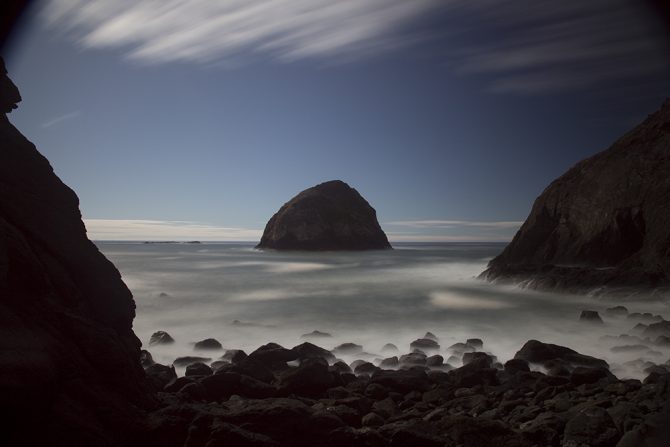
Isolated No. 6 – Before
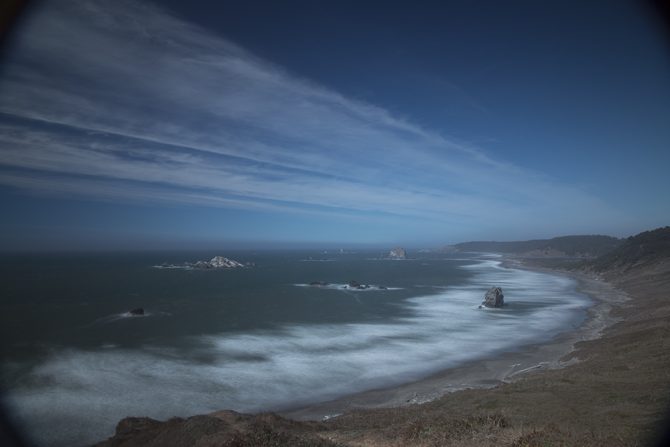
I was lucky on this trip to have constantly changing weather conditions. Some days it was raining hard, others were sunny and others were constantly changing as on this day. The sun was coming and going and what I was trying to get was the sun hitting the island and the land left and right bits of land in shadow.
I was here for several hours trying to get the clouds and lighting just right. Sometimes the clouds were perfect, but not the foreground. At other times I’d get the shadowing how I wanted it but the clouds were no good.
I didn’t get exactly what I wanted in the shot, but I was confident that I’d be able to create the effect I was looking for in post processing.

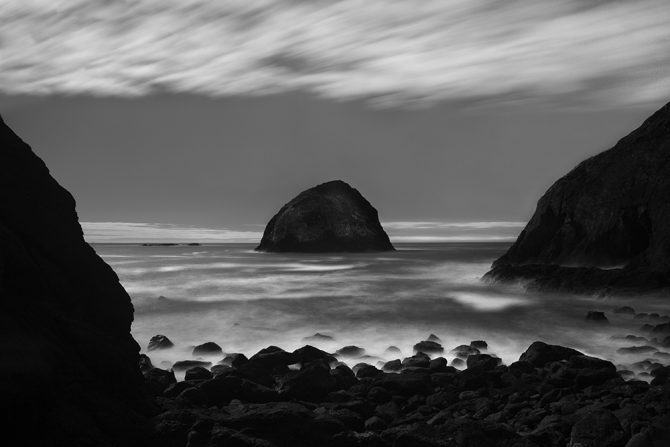
Isolated No. 6 – After
I burned the land down on the left and right to put the focus on the island. Then I dodged up the island to make it brighter. Then I went to work on the clouds, lightening the upper ones and darkening the smaller ones just above the island. Then I darkened the foreground to hide the detail and to bring the eye to the island.
~~~~~
So after seeing these “before and after” shots, I hope that you’ll not conclude that you need to learn more about Photoshop. It is not my intent to focus on post processing as the key to an image because that is exactly what I don’t believe.
Instead my approach is to have a Vision of the image and then let that drive the processing. When you have Vision, your processing then has purpose: to bring the image into compliance with your Vision.
And armed with that Vision, you don’t need to ask others what to do with your image, you already know how it’s going to look in your head!
Cole
Cole, thank you so much for sharing your thought process in how you choose to process your images to match your vision.
Wow, Cole! These are delightful images, but the before and after shots and information are wonderful!
Thanks for the great insight once again Cole. As for not being able to use a mouse to do what you do, it sounds like a topic for further elaboration in a future post. 🙂
Cole, thank you so much for revealing and explaining your creative process and insights. Great to see the before and after.
Cole, thank you for your wonderful work. I don’t use PS so I was more focused on how you defy all the conventional teachings, eschew others’ comments, and finish with a work of art that is uniquely you and far above most of what I see today.
Cole, this is a fascinating insight into one person’s work to achieve their vision – a great read!
Waow !
Still loving your pictures !
Thanks for sharing !
See you from old Belgium !
Cole, as I start to explore B&W photography, I’m struggling trying to imagine how the initial color image will finally appear in B&W. Thank you for sharing your thought process from taking an initial image to its conclusion. This is incredibly helpful to those of us still learning to “see”. Namaste.
Thank you. This was very informative and shows the beauty and creativity of your work. For me, finding “The Vision” at the time of capture, is still the most difficult part. You have demonstrated how far one must “stretch oneself” to produce a personally satisfying image.
Cole,
Ohhh Yea, Baby!! Workshop in a box. This for me is the most inspirational of all your messages. Seeing these “Befores and Afters” alone is a gift. With your explanations, it becomes a trophy. Thanks, also, for having the willingness to share a process that has taken you years to achieve.
Your explanation of Vision reminded me of something I recently read in a book about Poetry. I think there is a strong parallel to what that book said about writing Poetry to all Art, including photography. Good photographs, after all, is a form of poetry. Both evoke emotions.
The final product, the book said, should convey not the Literal Truth, but the “Emotional Truth” of a scene or a feeling (or a subject). How simple. How elegant. How challenging and difficult.
Thank you, Cole, for showing how you do it.
One of the best blog postings I’ve ever read! I appreciate you taking the time to explain how you visualized the images on location, how they came out of camera and then how you processed them to reflect your vision. Now, if you don’t mind, I must go back and read it again. Thank you.
Reminds me of your work
http://www.nazraeli.com/complete-catalogue/michael-kenna-shinan-limited-edition
Mark
Great article,Cole
Thank you !
Very beautiful, Cole, and thank you so much for sharing your thoughts on your process.
Thank you so much for sharing your creative process- it’s a great insight for us beginning to see black and white.
Not only is your art inspirational, your willingness to share your thinking is as well.
The “lesson” is appreciated.
Pen? mouse? I’ve not used a Pen, so can’t compare. Is the difference being steadiness?
Really enjoyed this, Cole. I’m beginning to reexamine my own black and white processes and articles like this are very inspirational.
Not sure why the fringing is happening with your jpgs, but one way to fix it is to bring the file into Photoshop and use the clone stamp. Set the brush blend mode to darken and the brush opacity to around 80%. Sample the sky just around the monolith and brush along the edge. Doesn’t always do the trick, but I find it works more often than not in situations like this.
thank you for sharing and insight. What pen tablet do you use!
When I click on the B&W Monolith 78 I get the colored photo enlargement from it’s above colored photo.
Love the work you did on all these photos and your clear explanations.
Hello Cole,
Yes, i’m a photographer too… even if it’s quite difficult to live from. 🙂
I don’t remember how (and when, but it’s quite a long time) I found you and your website, but surely when looking at long exposures… that I really like an do (portraits and landscapes).
Thanks !
I am ever-inspired by your work and the process by which you create, Cole.
I am spending a lot of time on Lynda.com these days going over all basics I thought I knew and learning to grow from them. Your post today with before and after images, along with commentary of how you plan is a great help to me. Thanks again!
Thanks Cole, always fascinating to get insights into the artistic process through “before and afters.”
So interesting to “hear” your thought process! Demonstrates your creativity from start to finish…but I’d guess we all knew that about ya!
Cole, it’s very generous of you to share this information. I think a lot of photographers would just say they used Photoshop and keep a lot of specifics to themselves.
I like your work/thinking/feeling.