May 21, 2015
Photoshop and Six Tools…with a Video Demonstration
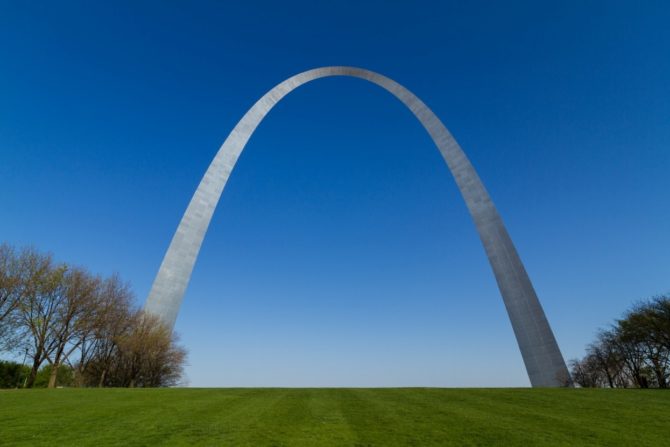
Yesterday my friend John Evans Jr. and I were talking about how I process my images. He shoots these great color shots of the St. Louis Gateway Arch and recently showed me the image above. He was trying it in black and white and called with a few questions about my processing techniques, and I was trying to describe some of my techniques over the phone.
It is difficult to convey some things with words and so I told him that I’d make a quick and dirty video of me processing an image.
For years I hid my workflow from others because I thought it simple and backwards. As I listened to other photographers talk about their sophisticated processes, I was embarrassed to let them see my rudimentary ones. What if they started asking me about layers…I don’t understand or use them!
Fortunately with time I came to the realization that it’s not about my processes, it’s about my images. Nothing else matters.
There are many ways to use Photoshop and I doubt many photographers use more than a small percentage of its many tools. There is no right way or wrong way to use it and not one workflow will be right for everyone.
My procedure works for me and I’d like to share it to illustrate a point: that you don’t need to know a lot about Photoshop or have a complicated workflow to produce beautiful images.

Here are the six tools that I use to process most of my images:
1. RAW Converter – I use Photoshop’s RAW converter to convert my RAW image into a 16 bit, 300 ppi TIFF file. There are also a number of image controls in the RAW converter and I try to do as much work here as possible.
2. B&W Conversion Tool – I like Photoshop’s b&w conversion tool and play with each color channel to see how it affects the different parts of my image. I tweak everything to taste. But be careful about changing the blue channels too much, they make your skies look great but add a lot of noise to the image.
3. Levels – One of the most basic secrets to a great b&w image is to have a good black and white in the image. You cannot trust your eye and how the image looks on the monitor, you must look at your histogram to accurately determine this. I use “Levels” to set a true black and white point, then I adjust the midtone slider which can radically change the look of my image.
4. Dodging and Burning – This is where I do most of my processing and where I have the most fun! I feel most at home with dodging and burning because that’s how I did things in the darkroom. However the primary difference today is that I can take my time and exercise minute control over every part of the image.
I use a Wacom tablet to dodge and burn because you CANNOT do a good job with a mouse. It is difficult to describe with words how I dodge and burn and so I hope the video helps illustrate this.
5. Contrast Adjustment – Once the image looks great on the screen, experience teaches me that it will print flat, and so I add some contrast. A monitor uses transmitted light and a print uses reflective light, so that means it will take a lot more work to get your print to look as snappy as it does on the monitor. Contrast helps.
6 Clone Tool – I use the clone tool to spot my images. Cloning is so much better than the old days when you had to spot every spot, on every single print and your mouth would taste like Spotone all day!
In sharing these six steps, my point isn’t that you should imitate my workflow, but rather that a workflow need not be complicated. Did you notice that I didn’t make mention of special b&w conversion programs, plug-ins, curves or layers? I also don’t use monitor calibrators, profiles, RIP’s or special inksets.
I use Photoshop and six tools. Ofttimes there’s beauty in simplicity!
Here is a quick and dirty video demonstration of my Six Steps.
Cole
P.S. My apologies for such an amateurish video, but I knew that if I waited until I learned to do it more professionally, it would never get done.


Hi again Cole,
“Oft times there’s beauty in simplicity” – agree absolutely.
I enjoyed the video. I use a different package, but essentially a very similar simple process.
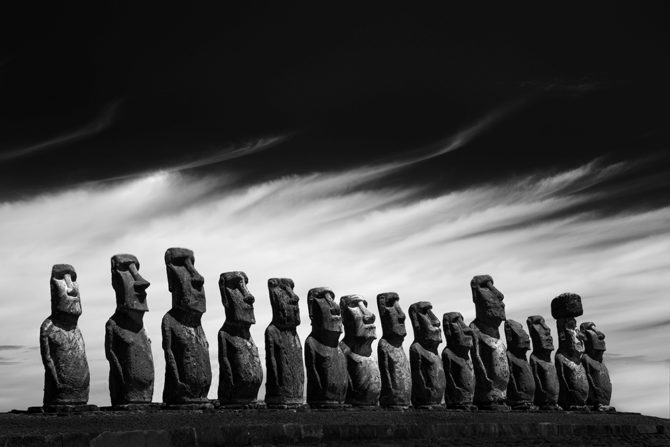
You do realise that my age old longing to visor Easter Island has been once again rekindled?
Damn it all!!!
🙂
Cheers,
Willie
The KISS method at its finest! I may even try some processing in PS now.
Thank you Cole,
-G
Wanna buy a good used NIK software plugin? 🙂
Thank you, thank you. For me a video always works best (or a live demo) as opposed to the written word in a book. I had assumed that you might be using another tool (e.g., the gradient tool) to get your skies so uniformly dark and, if I recall correctly, in some images going from very dark at the top to less so as you move down the frame. I learned much from the video and its timing couldn’t be better in that I have just started learning to use the Wacom tablet and to use the dodge/burn tools.
Cole,
Thanks so much for the peek at how you create such great images.
I do have one question: Why not do all the work in in Adobe Raw? You can use the brush tool to dodge,burn and apply contrast locally and use the spot removal tool to remove dust spots etc. Of course you can crop as well and all of these are non destructive to the original image.
Is it a matter of preference or is there something in your approach that gives you a specific outcome?
I use the non-destructive Channel Mixer approach to BW conversion. As in street fighting, there is only one rule when it comes to grayscale conversion — ‘there is no rule’.
Thanks for this simple little tutorial of your work flow, Cole. I think we mortals like to think that if we take a long time, work hard and think a lot our product will excel. Your flow is great demonstration of just the opposite. Thanks again.
Patrick Mulligan
Cole,
You cracked me up with your smooth low tech tutorial. NIK and MacPhun better hope not to many people see it or their sales might plummet.
Thanks for showing your workflow ; )
Peace,
Janne
Thanks so much for making this video, Cole! I especially appreciated watching your technique for burning skies and the way you removed the distracting foreground by working through highlights/midtones/shadows. I love learning something new first thing in the morning…terrific way to start my day!
What a wonderful video with such a positive feeling. You have a nice voice and a kind of Bob Ross way to explain. Thank you so much, you should definately make more of these!
Thanks so much for the video. It quickly reminded me not to depend on presets, but to be creative using the tools in Photoshop.
Hi Cole, Thanks for the demo…again, your images are fantastic!
Hi Cole. Great video. I always struggle with the editing process but this has given me new hope. Keep up the great work.