Category: Technical
October 30, 2016
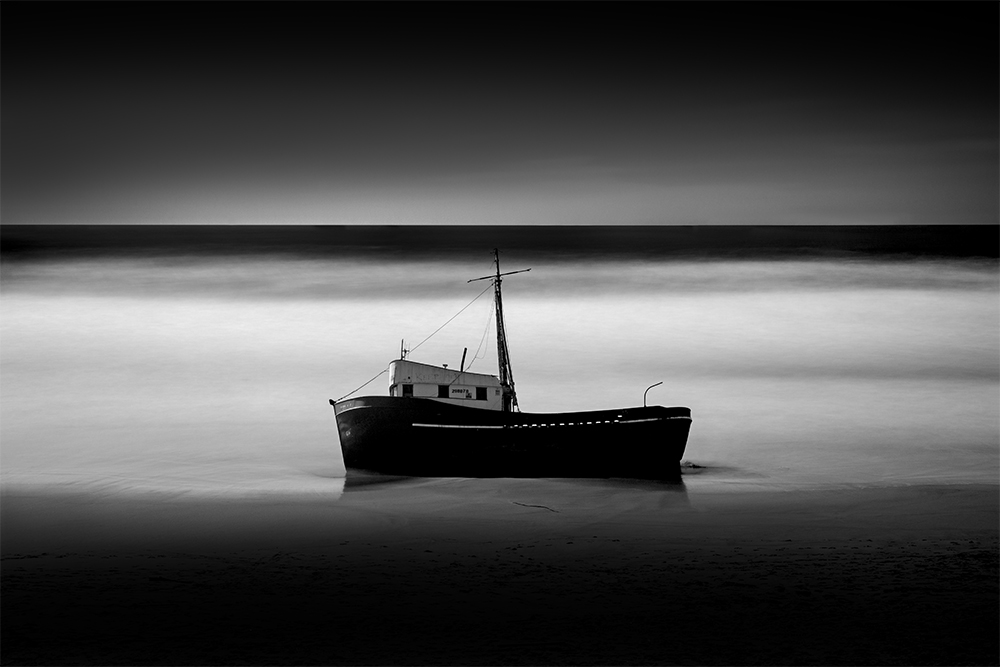
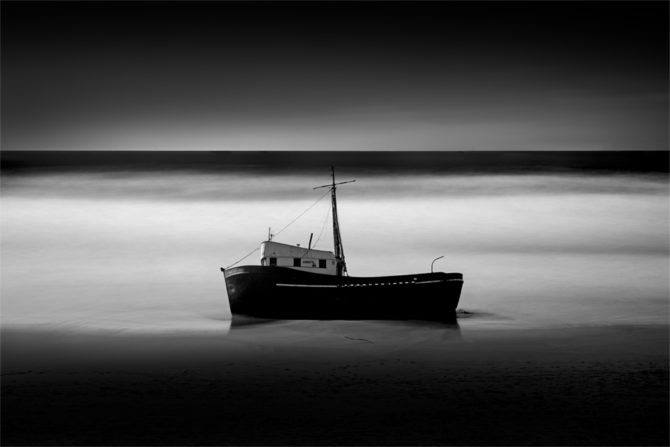
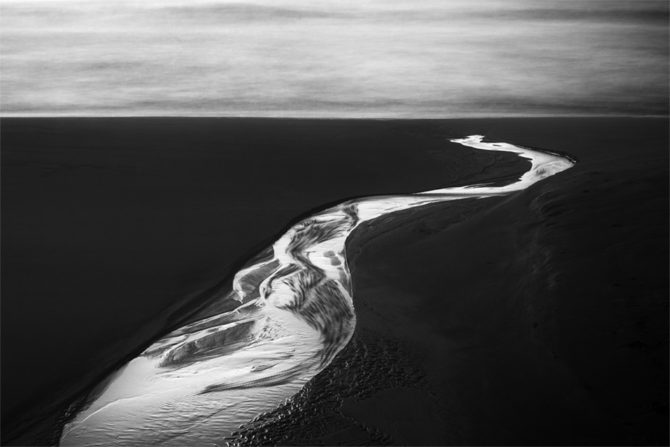
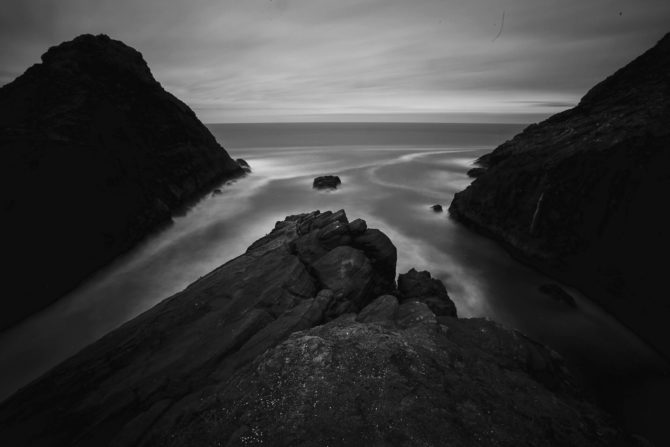
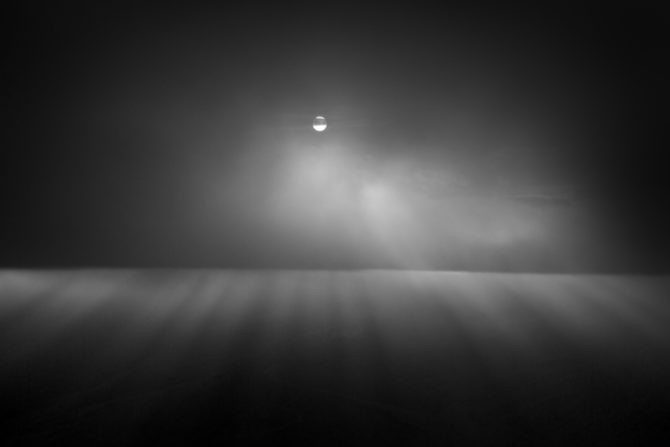
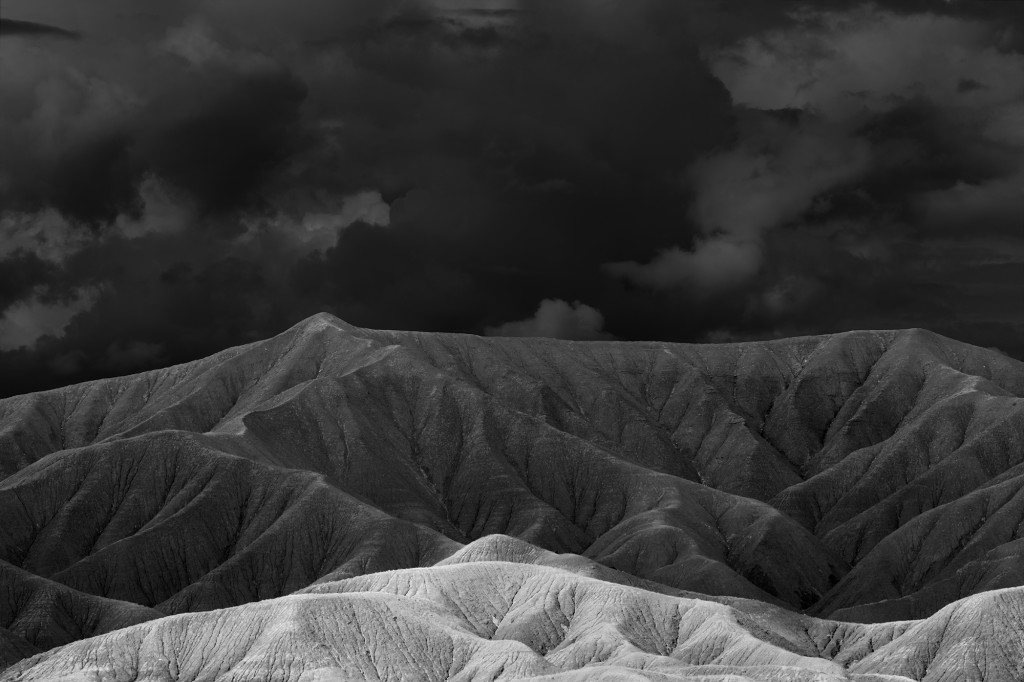
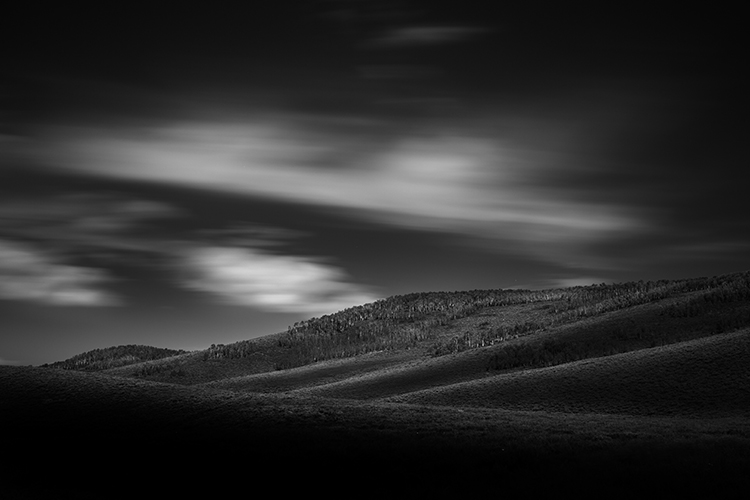
Run Aground – 2 minute exposure
I’ve just processed the first images from my Canon 5D Mark IV and wanted to report back on what I’ve found. To recap my previous post regarding the Mark IV: I love the new features and increased resolution, but my litmus test is how much noise there is on images with long exposures of 2 minutes and longer, and particularly those images that have been underexposed (which is how I shoot).
I’m happy to report that the Mark IV does much better than what I experienced with the 5DSr. Exposures up to 2 minutes are very clean. The image above was a 2 minute exposure and I was very happy with the quality and noise levels.
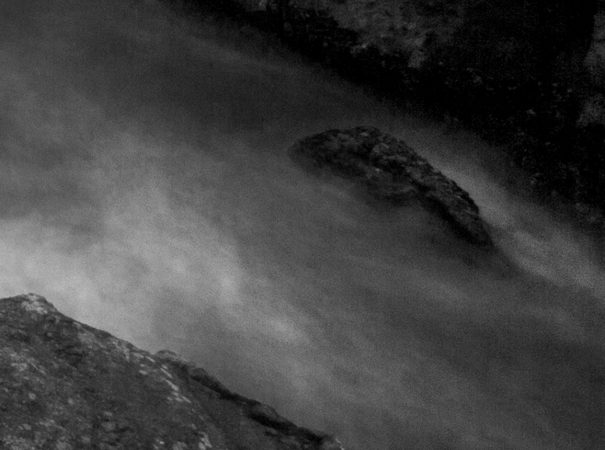
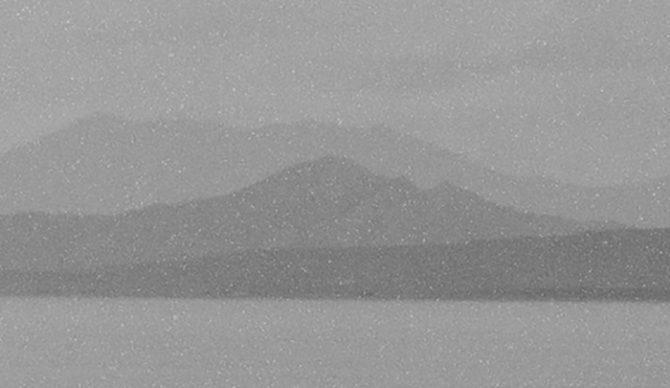
But what about images that are over 2 minutes? Here’s a 6 minute exposure:
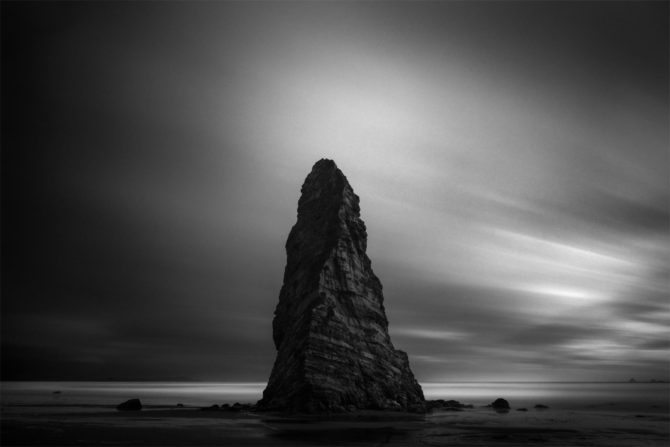
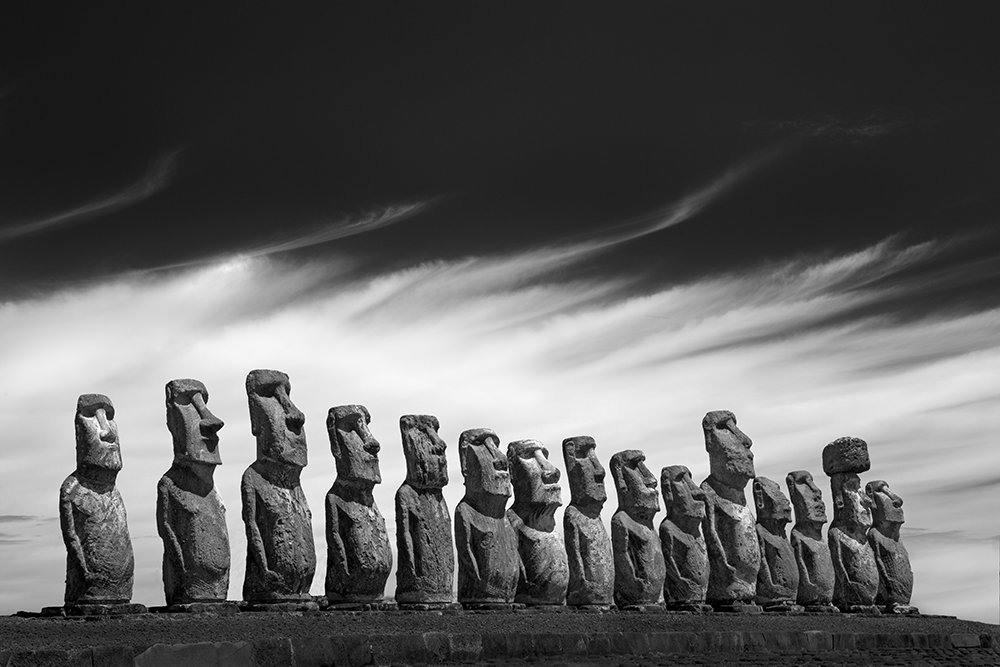
Monolith No. 97 – 6 minutes
This image was shot at sunset and was greatly underexposed (perhaps by 3 stops) due to the sun going down during the exposure. I found it had much more noise than a 2 minute exposure, but I was still able to work with it and salvage the image. So I was pretty happy about that.
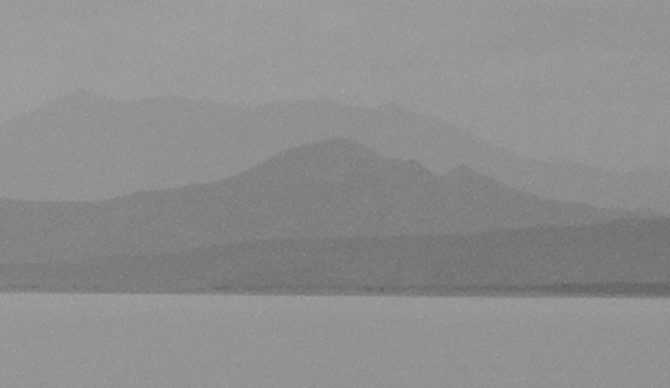
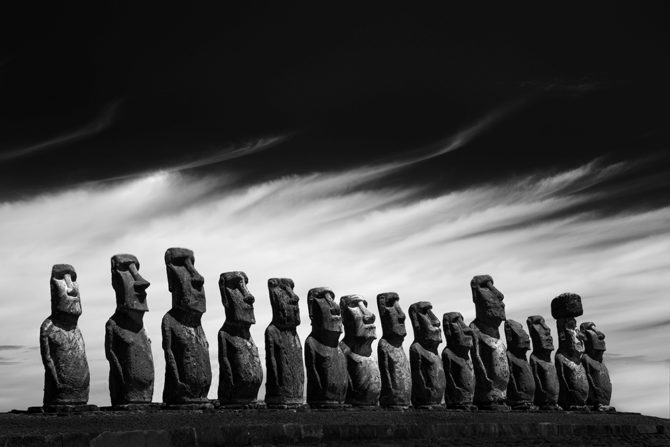
Here is the same scene with a 2 minute exposure:
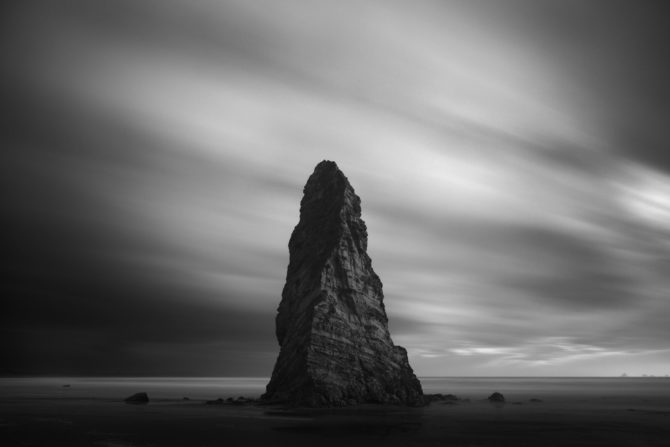
Monolith No. 98 – 2 minutes
There is no doubt that this image is cleaner and has less noise. But as I said, with a little extra work the 6 minute exposure was usable.
Patterning. I don’t really know what to call this phenomenon I’ve seen with the Mark III sensor, but I call it “patterning.” It’s a pixel pattern that shows dark streaking vertical lines in areas that have been heavily dodged and burned.
This is an example of light patterning from a Mark III image. Sometimes I have to back off my dodging and burning in these areas or I’ll break up the lines with dozens of healing brush taps.
Fortunately I have not yet seen this patterning appear with the Mark IV images, which is very encouraging. But again I’ve only shot and processed a few images.
Conclusion: I am very optimistic that the Mark IV images are going to serve me well with my style of long exposure and underexposed shooting.
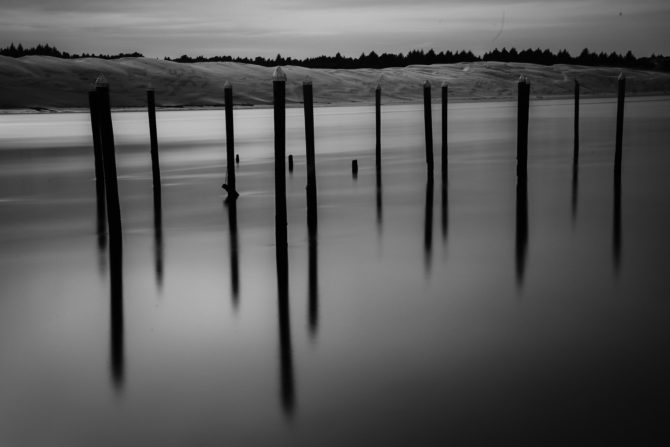
Separation No. 2 – 30 seconds
October 14, 2016
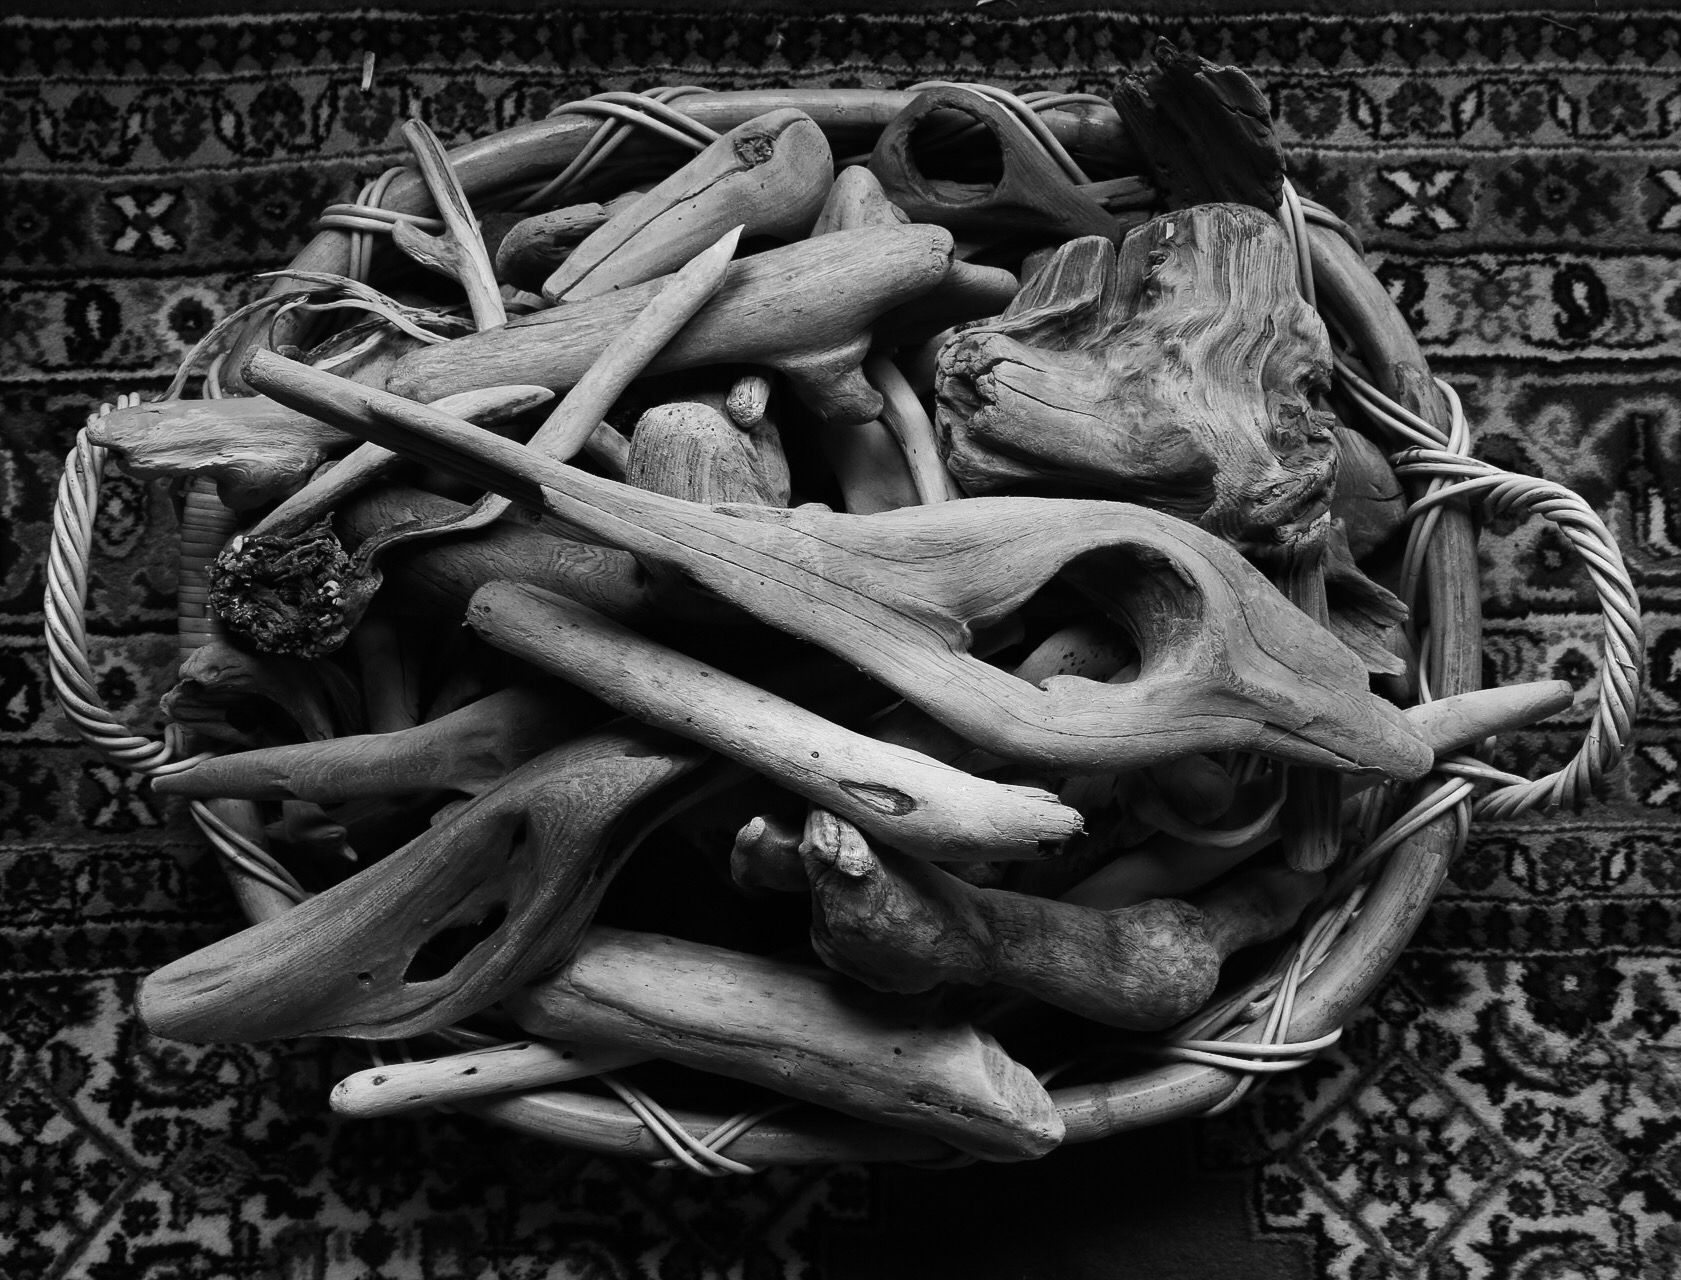
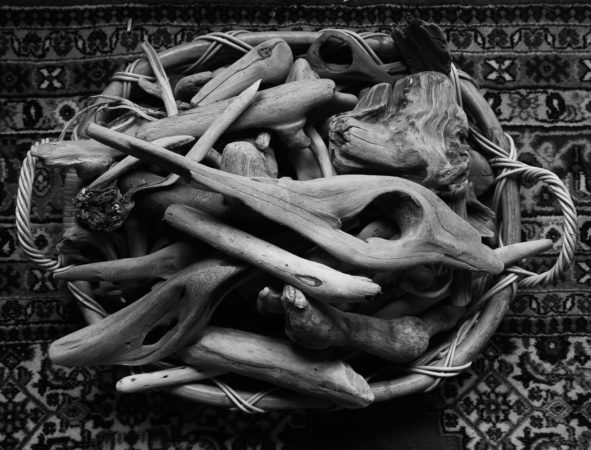
(Basket of Driftwood, my first Mark IV image)
I am in Bandon, Oregon and have just received my new Canon 5D Mark IV today. I have spent only a few hours with it and wanted to share my very, very first impressions.
First, it’s pretty easy to learn since it’s so much like the Mark III. That’s a good thing.
But they’ve added several new features that will make my life easier, including:
They have moved the position of the remote control terminal to the front of the camera. This means that you can now use the remote cable release and keep the left side connector covers in place. This is important because previous models have had a light leak on the left side when doing very long exposures. I’m hopeful that leaving the covers in place will now block the light leak.
The Camera now has a long exposure timer, something that they introduced on the 5DS. This means I can use Bulb mode to do very long exposures without a cable release, or more importantly, continue to shoot very long exposures if my cable release fails (as happened when my primary and backup cable releases failed on Easter Island).
A wonderful new feature allows the Mark IV to wirelessly transmit JPEG images to my iPhone. Here’s a Bandon image that I shot on the Mark III and then transmitted with the Mark IV:
My camera is set up to save a RAW and a JPEG, which I then transmit to the iPhone where I can do some minimal adjustments.
And then there’s the Mark IV’s sensor increase to 30 megapixels, which is a 7.5% improvement. I feel this is a more reasonable and balanced increase than what they did with the 5DSr going to 50 megapixels.
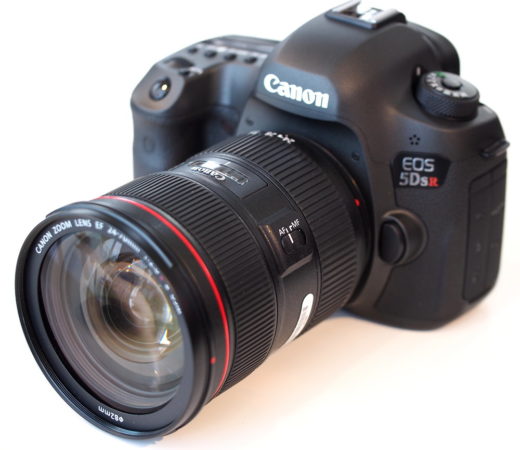
Which brings me to the real test of the camera (for me and my applications): how much noise is introduced by the new sensor during a very long exposure (greater than 2 minutes). If you will recall, I had a very bad experience with excessive noise on the Canon 5DS images
So I had the camera shipped to me here in Bandon, where I was hoping to do some long exposure work and put the camera to the test. However we have had two big storms and I’ve only been able to get out shooting twice.
And now they’re saying the storm arriving tonight will bring 80 mph winds, 40 foot waves and rain through the duration of my trip!
(audible sigh)
Cole
February 12, 2016

The images on my dead memory card are ALIVE!
All of them were successfully recovered thanks to Disk Doctors (www.DiskDoctors.com). They were fast and communicated with me daily during the recovery process.
After seeing the recovered images, I am so grateful that I chose to save them. Yes, it was expensive ($750) but that was much less than the other companies wanted and most importantly, I had a lot of good images on the card!
Here’s one of the images that I’m working on:
February 4, 2016
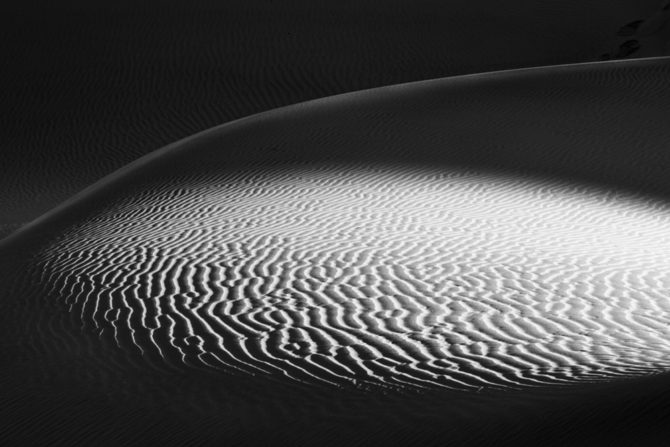
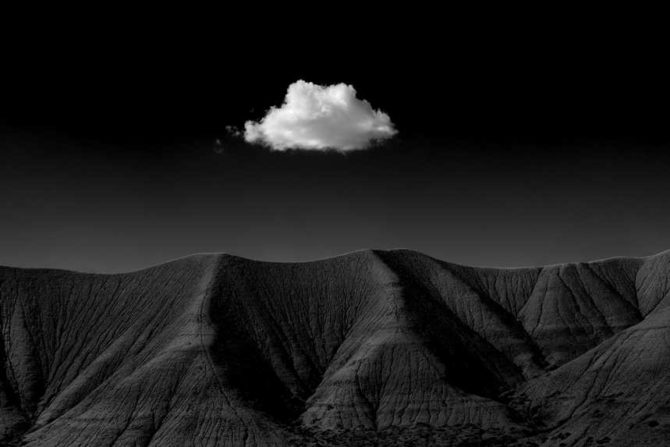
Beneath the Clouds – Dante’s View, Death Valley
The wonderful thing about hard lessons is that they create such strong and lasting convictions.
A couple of years ago on my annual Death Valley trip I was using my new Canon 5D Mk III and had hastily set it up before leaving on the journey. When I got home I realized that I had been recording in B&W JPEG mode and not in Color RAW mode. That was a very hard lesson because I lost many of the images and the remaining ones were not “what they should have been.”
And now Death Valley has once again been the location for another hard lesson.
My Mk III has two card slots and I have always set the camera to write to both cards simultaneously, using the second card as a backup. But after years of never having a card failure, I switched the camera to record to only one card.
Ironically I made that change on this trip and as fate would have it, the card died mid-trip.
I could not read the card with the camera and I could not read it with the computer. Windows could not even see the card (never a good sign) and I tried using three different recovery programs on it…without success.
So I started calling around to disk recovery services and after hearing prices as high as $2000 to recover the images, I finally went with a company that charged $650 and only if they successfully recovered the data. That’s a lot of money for some images, but after all the time and money I had spent on this three week journey, it is worth it to me.
The company was able to recover some of the images and the card is on the way back to me. Soon I’ll know how many of my images were saved. The image above and about 25 other dune images were captured on my second card, the one that should have been a backup of my data.
I’m always lecturing my kids that decisions shouldn’t be based on probabilities, but rather on consequences. The probability of a card failing is very low, in fact I’ve never had it happen once since I started using digital in 2004. But the consequences are high “if” it fails (some say “when” it fails).
The probability of my card failing was low, but the consequences were high.
The lesson learned? Write to both cards even if there is only a one in a million chance that the card will fail.
Cole
November 25, 2015
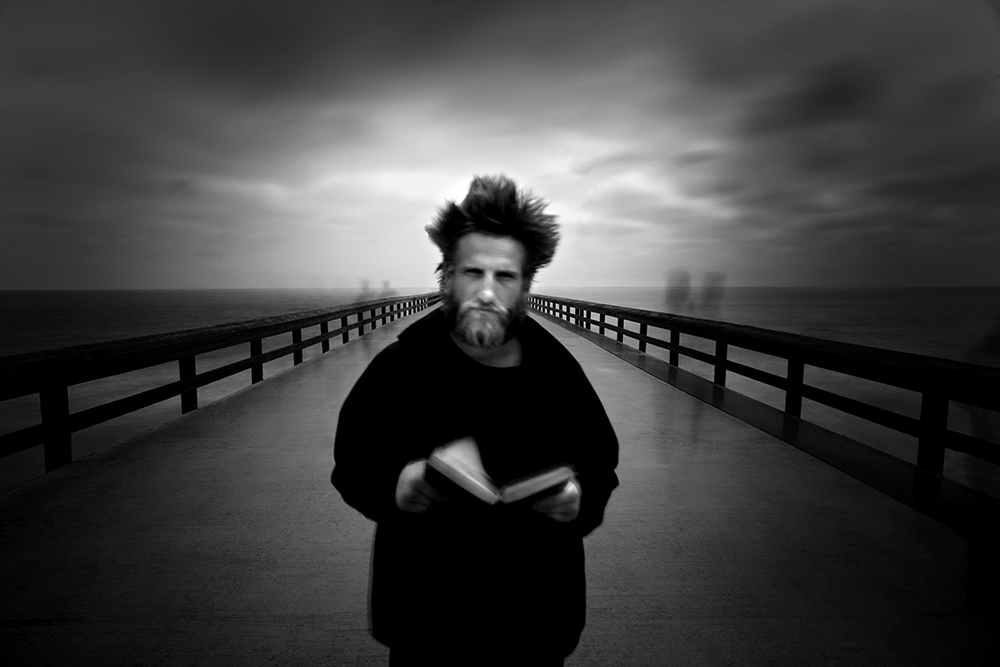

This is the Angel Gabriel.
I met him on the Newport Beach pier as he was eating French Fries out of a trash can.
He was homeless and hungry. I asked him if he would help me with a photograph and in return, I would buy him lunch.
The pier was very crowded and I wanted to take a 30 second exposure so that everyone would disappear except Gabriel.
We tried a few shots and then Gabriel wanted to hold his bible. The image worked and the only people you can see besides Gabriel are those “ghosts” who lingered long enough for the camera to record.
Gabriel and I then went into a restaurant to share a meal; he ordered steak with mushrooms and onions.
When it came, he ate it with his hands.
I discovered he was Romanian and so am I, so we talked about Romania. He was simple, kind and a pleasure to talk with.
I asked Gabriel how I might contact him, in case I sold some of the photographs and wanted to share the money with him.
He said I should give the money to someone who could really use it; that he had everything that he needed.
Then the Angel Gabriel walked away, content and carrying his only two possessions: a Bible and a bed roll.
_______________________________________________
My Dear Friends,
The Center for Fine Art Photography asked if I would help them raise money by offering (50) prints of Harbinger No. 1 (below) and of course I said “Yes!”
Well my printer died just as I was going to prepare them and so I fell behind schedule. And as soon as the printer was fixed, I rushed to print them.
But after I had printed 32 of the prints, it suddenly occurred to me that I was printing the wrong image! I was printing The Angel Gabriel and not Harbinger No. 1.
How did I make such a silly mistake? Well, I had just printed an order for The Angel Gabriel and then just kept going, not stopping to think about what I was doing.
Now I have a stack of prints of the Angel Gabriel and will offer those at the same price that The Center for Fine Art Photography is selling Harbinger No. 1:
$100 which includes shipping. The print is 8 X 12 on Hahnemuhle Photo Rag 308.
Now if you don’t know me, and I realize that many of you do not, you might think this is a staged event, a sales tactic to sell prints. Heck, I’d be suspicious of that also!
But it’s not a gimmick. It really happened exactly as I have said.
If you’d like to purchase a print of The Angel Gabriel, please send me an email at Cole@ColeThompsonPhotography.com and be sure to include your address.
Thanks and Happy Thanksgiving!
Cole
P.S. If you prefer Harbinger No. 1, please check out the “Double Double” promotion over at The Center for Fine Art Photography. Click here to see the promotion.
July 31, 2015

Searching
The solution? I returned the camera.
The 5DSr is not the right camera for my long exposure work.
Cole
July 24, 2015

Overshadowed
I’ve returned from my first outing with my new Canon 5DSr and wanted to report back on what I thought of my first images.
The image above was shot at 1/80 of a second and I was impressed with the quality. I was able to blow it up much larger than images from the 5D Mk III and have it hold its detail. I am happy with the quality of this image.
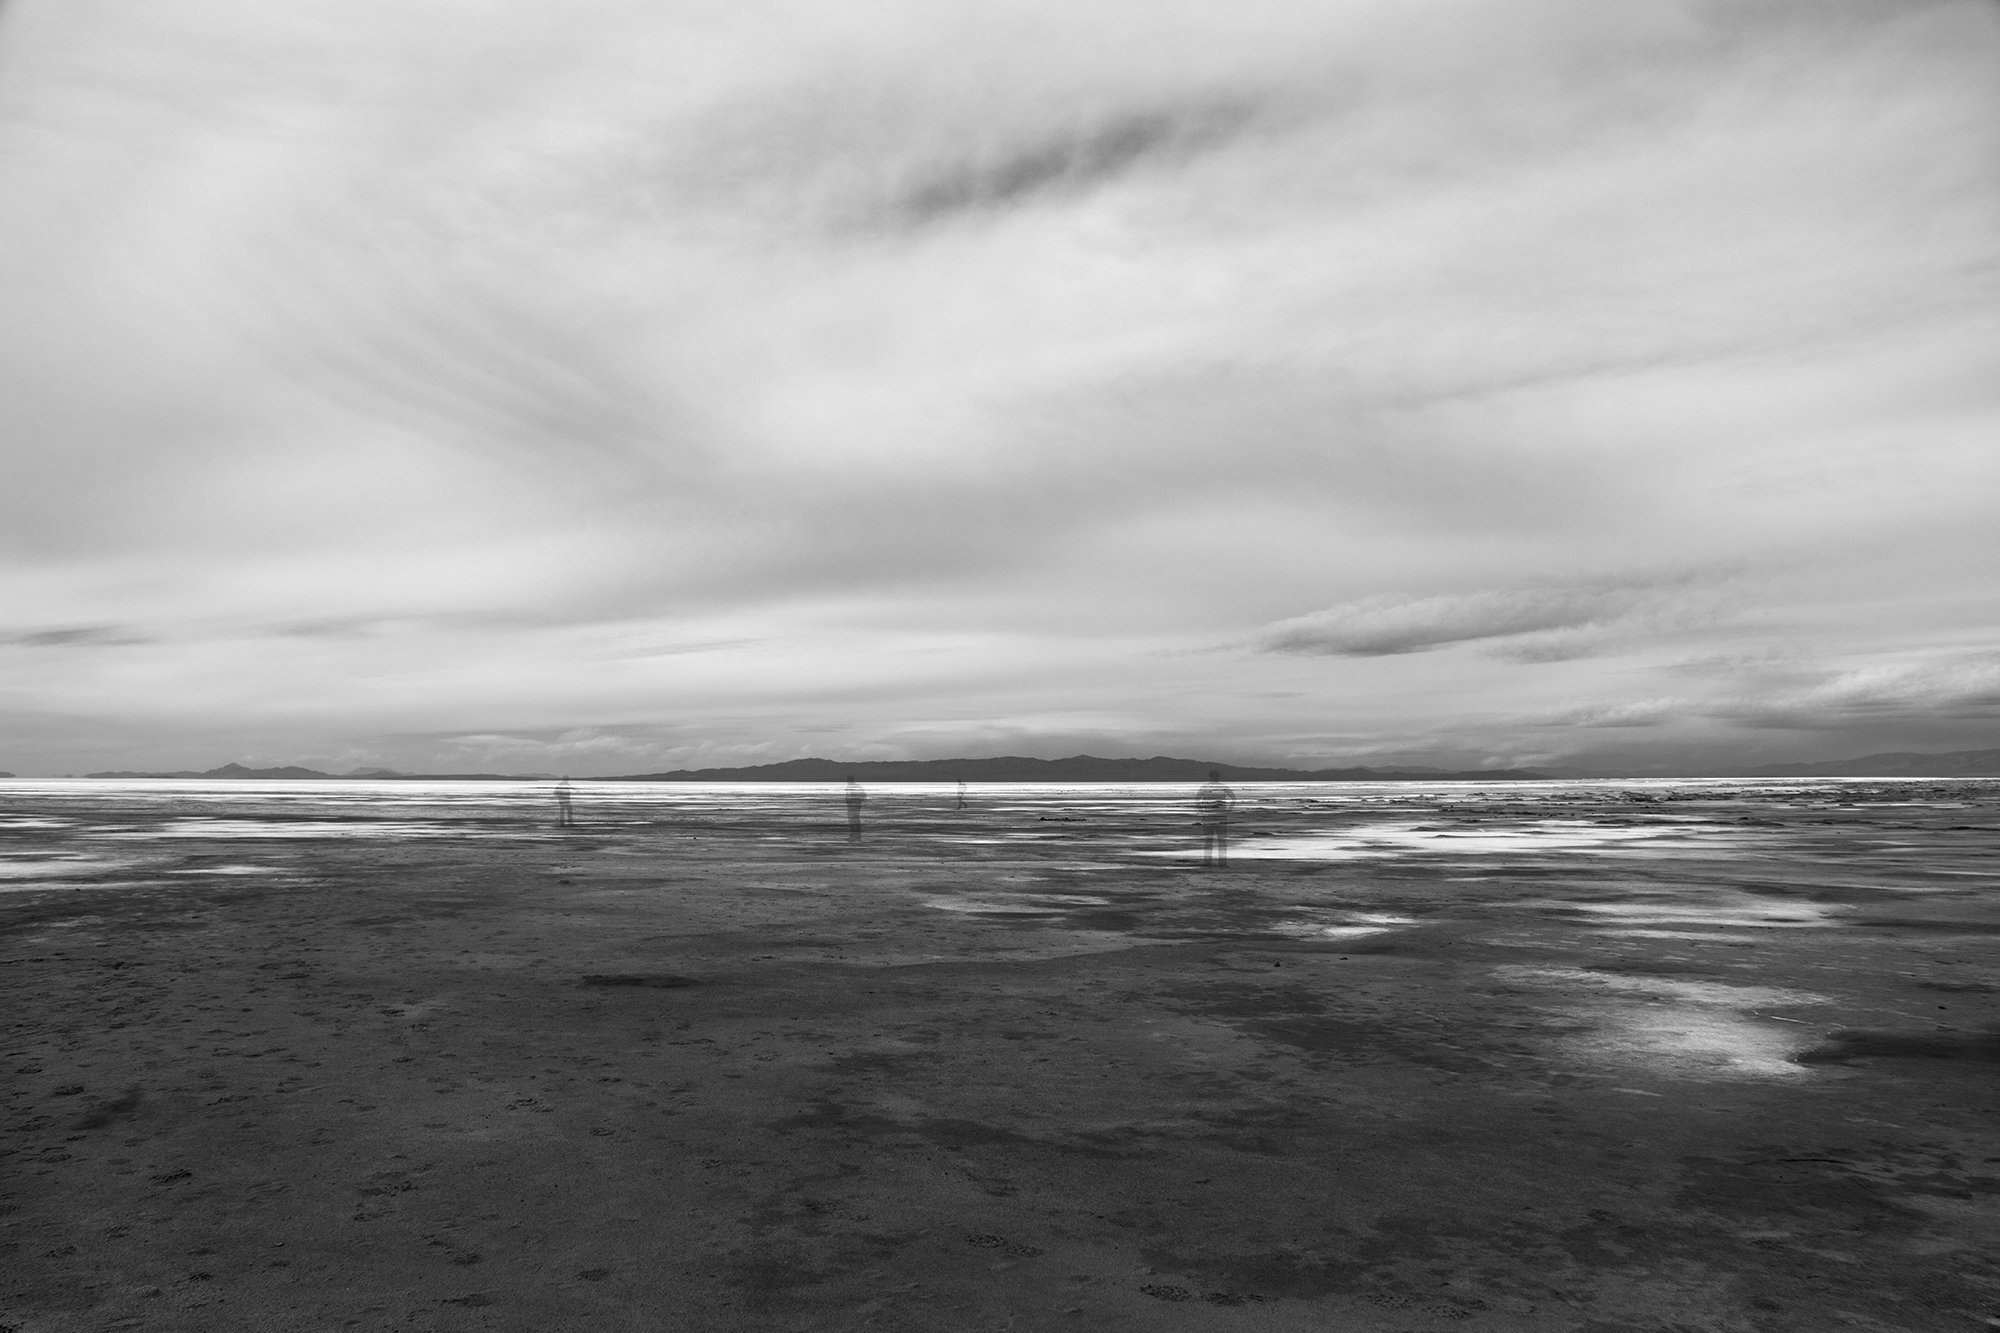
The next image is from the Spiral Jetty on the Great Salt Lake, this image was shot at 240 seconds:

Spiral Jetty
The quality of this image was very disappointing. I opened the RAW file and it was so noisy that I didn’t think that I could salvage this image. By using the dust and scratch filter in Photoshop and by adding grain, I was able to make this image “acceptable.”
I suspected the noise came from the long exposure and I was in fact worried about this going in. The larger number of pixels packed into the same area means that the pixels are smaller and more prone to noise, especially during long exposures. But I didn’t expect this poor of a result.
I then found the same image that I had shot at 120 seconds and compared a blown up section of the two:
240 seconds
120 seconds
.
The noise at 120 seconds is reasonable while at 240 seconds the noise is completely unacceptable. I only have a few shots to judge this by, but all of my longer exposures have this noise and so I’m sorry to report that my first results with the 5DSr are disappointing from a long exposure perspective.
I will do some formal testing to see how exposure times affects noise levels. As I learn more, I’ll let you know what I find. And if you know something about this issue, please share it with everyone.
Cole
July 10, 2015

(Monolith No. 50 – NOT created with the Canon 5DSr!)
I’m on the road in Utah and Nevada with my 5DSr and I wanted to report in with some first impressions. Unfortunately I cannot post any images until I return home.
The new camera looks, feels and handles like the 5D Mk III and so I was able to get up to speed relatively quickly. That was nice. However to take full advantage of the many new features, I will have to spend some time going through the menus. As always, the number of features is overwhelming.
There are two new features that immediately caught my eye and got me excited for long exposure work, they are:
Delay After Mirror Lockup: You can set the shutter to trigger after the mirror has flipped up and settled down, making sure the vibrations are gone before the shutter opens. I have mine set to 1/2 second.
This means that mirror lockup can now be a one button press just like a regular shutter! I cannot tell you the number of times I had forgotten to turn off the old two-button mirror lockup and then pressed the shutter once thinking I was taking a picture, when I was not. This new feature will help avoid that mistake.
Bulb Timer: You can now set the length of your bulb exposure in the camera! No more using your watch (and forgetting where you started) and I can now ditch the digital kitchen timer that was always going off in my camera bag just as I was going through security.
Now let me combine these two features and show you why I think this is so great for long exposures. I can now press the shutter button once and the following occurs:
- The mirror flips up and settles down
- A half second later the shutter opens
- The shutter stays open for as long as I’ve programmed it for
- The shutter closes by itself
I can still choose to shoot with a cable release, but now if I forget to bring one, lose or break it, I can still shoot long exposures. I had this problem on Easter Island when both of my cable releases went bad and I was really in a pickle.
These new features means that I no longer “need” a remote shutter release (although I still choose to use one for convenience) but the important thing is that I’ll never be stranded like that again.
One issue Canon did not address is the light entering into the camera through the eyepiece which caused internal reflections on the left and right sides of the 5D Mk III images. I had suggested to Canon that they put a small shutter on the viewfinder that automatically triggered during long exposures…but they didn’t.
To address this I had been using a hat to cover the camera during exposure, but in wind this didn’t work too well. So I build a “flap” that mounted to the hot shoe:
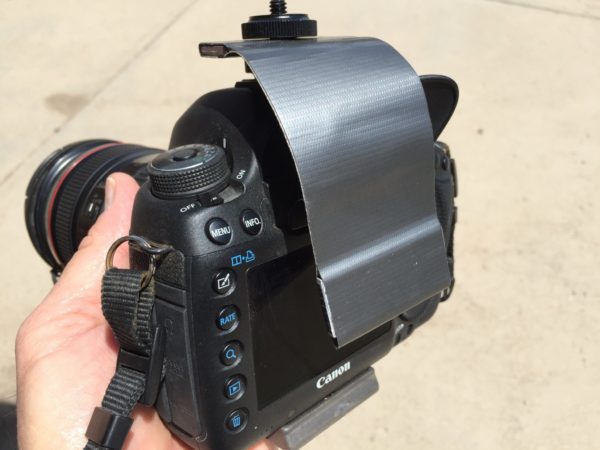
Unfortunately the flap doesn’t seal well enough around my Hoodman HoodEYE eyecup and so I ended up using the hat trick again. I’ll need to work on this contraption some more.
Note: Many people point out to me that Canon provides a small viewfinder block that you can slip into the eyepiece. Unfortunately this block does not work with the Hoodman HoodEYE installed and the eyecup is required to get an accurate long exposure meter reading.
Summary: I purchased the 5DSr so that I could print my images larger and so it was an unexpected treat to find some new features that makes long exposure work easier. I like these new features very much!
I’ll not know what the images look like until I get home. I’m curious how the new 50mp sensor does with noise during long exposures since I found the Mk III to be noisier than the Mk II.
Cole
May 21, 2015

Yesterday my friend John Evans Jr. and I were talking about how I process my images. He shoots these great color shots of the St. Louis Gateway Arch and recently showed me the image above. He was trying it in black and white and called with a few questions about my processing techniques, and I was trying to describe some of my techniques over the phone.
It is difficult to convey some things with words and so I told him that I’d make a quick and dirty video of me processing an image.
For years I hid my workflow from others because I thought it simple and backwards. As I listened to other photographers talk about their sophisticated processes, I was embarrassed to let them see my rudimentary ones. What if they started asking me about layers…I don’t understand or use them!
Fortunately with time I came to the realization that it’s not about my processes, it’s about my images. Nothing else matters.
There are many ways to use Photoshop and I doubt many photographers use more than a small percentage of its many tools. There is no right way or wrong way to use it and not one workflow will be right for everyone.
My procedure works for me and I’d like to share it to illustrate a point: that you don’t need to know a lot about Photoshop or have a complicated workflow to produce beautiful images.
Here are the six tools that I use to process most of my images:
1. RAW Converter – I use Photoshop’s RAW converter to convert my RAW image into a 16 bit, 300 ppi TIFF file. There are also a number of image controls in the RAW converter and I try to do as much work here as possible.
2. B&W Conversion Tool – I like Photoshop’s b&w conversion tool and play with each color channel to see how it affects the different parts of my image. I tweak everything to taste. But be careful about changing the blue channels too much, they make your skies look great but add a lot of noise to the image.
3. Levels – One of the most basic secrets to a great b&w image is to have a good black and white in the image. You cannot trust your eye and how the image looks on the monitor, you must look at your histogram to accurately determine this. I use “Levels” to set a true black and white point, then I adjust the midtone slider which can radically change the look of my image.
4. Dodging and Burning – This is where I do most of my processing and where I have the most fun! I feel most at home with dodging and burning because that’s how I did things in the darkroom. However the primary difference today is that I can take my time and exercise minute control over every part of the image.
I use a Wacom tablet to dodge and burn because you CANNOT do a good job with a mouse. It is difficult to describe with words how I dodge and burn and so I hope the video helps illustrate this.
5. Contrast Adjustment – Once the image looks great on the screen, experience teaches me that it will print flat, and so I add some contrast. A monitor uses transmitted light and a print uses reflective light, so that means it will take a lot more work to get your print to look as snappy as it does on the monitor. Contrast helps.
6 Clone Tool – I use the clone tool to spot my images. Cloning is so much better than the old days when you had to spot every spot, on every single print and your mouth would taste like Spotone all day!
In sharing these six steps, my point isn’t that you should imitate my workflow, but rather that a workflow need not be complicated. Did you notice that I didn’t make mention of special b&w conversion programs, plug-ins, curves or layers? I also don’t use monitor calibrators, profiles, RIP’s or special inksets.
I use Photoshop and six tools. Ofttimes there’s beauty in simplicity!
Here is a quick and dirty video demonstration of my Six Steps.
Cole
P.S. My apologies for such an amateurish video, but I knew that if I waited until I learned to do it more professionally, it would never get done.
September 18, 2014
 Utah Hills, Created with the Singh-Ray 15 Stop Fixed ND Filter
After years of experimentation and trying various ND filter combinations, I have assembled what I believe to be the worlds perfect ND kit. It consists of the following:
5 stop fixed ND filter in 82mm
10 stop fixed ND filter in 82mm
15 stop fixed ND filter in 82mm
20 stop fixed ND filter in 82mm
Singh-Ray Vari-ND in 82mm
Step up rings on each of my lenses so they all can use 82mm filters
Those of you who are shooting long daytime exposures will appreciate what this means. I can now shoot with 5, 10, 15 or 20 stops of ND without stacking two filters together or vignetting!
I am in pig heaven. Seriously.
But my perfect kit would not be complete without a Singh-Ray Vari-ND filter. This is a variable filter that gives you between 3 and 8 stops of neutral density and it works just like a polarizer: turning it one way gives you more ND and turning it the other way gives you less.
It is critically important for me to have this variable filter because it allows me to photograph dynamic subjects (eg: people or other moving objects) quickly without removing the filter to compose the image.
With fixed filters the viewfinder is so dark that I cannot compose without removing the filter. And taking filters on and off takes precious time (which I may not have when photographing people) and sometimes I accidently change the zoom or focus settings, which ruins the shot.
With the Vari-ND I can dial the filter open, compose, and then close the filter down to shoot. I can do this very quickly which is critical.
The Vari-ND filter is the one piece of equipment that allowed me to photograph the ghosts at Auschwitz-Birkenau.
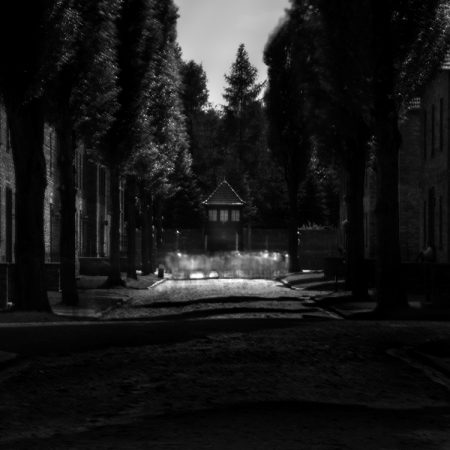
If had I visited the camps armed only with my fixed ND filters, I could not have created these images.
Now some of you looking at this list of filters might be thinking: everyone has heard of a 5 and 10 stop…but a 15 and 20???
Yes! Singh-Ray offers a 5, 10 and 15 stop filter and then they built a 20 stop filter for me (which I think they’ll be offering to the public before long).
Why would I want a 20 stop filter? Because it allows me to get an 8 and 16 minute exposure in bright daylight, and now I don’t have to stack to get it! Stacking creates some serious vignetting when shooting wide, here’s a before-and-after of a two stacked filter shot to illustrate:
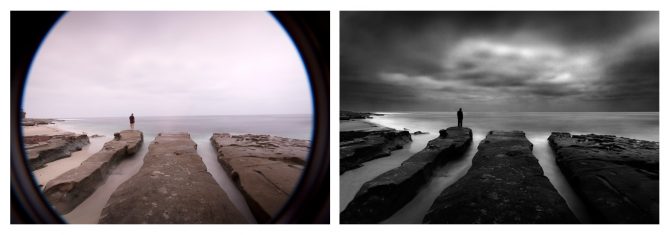
Being able to go from 5 to 20 stops without stacking is a huge deal for me.
I hope this doesn’t sound like a commercial for Singh-Ray because it’s not, but it is an honest plug. I’ve long depended on Singh-Ray’s filters, they are top quality and the customer service is unbeatable.
So if you’re wondering what ND filters to buy, here is the perfect combination of filters to aspire to.
Cole
P.S. Just to balance out all this technical talk, here is a favorite story of mine that puts equipment into perspective:
“A photographer went to a socialite party in New York. As he entered the front door, the host said ‘I love your pictures – they’re wonderful; you must have a fantastic camera.’ He said nothing until dinner was finished, then: ‘That was a wonderful dinner; you must have a terrific Stove.’” Sam Haskins