June 20, 2013
Matting and Framing Made Easy
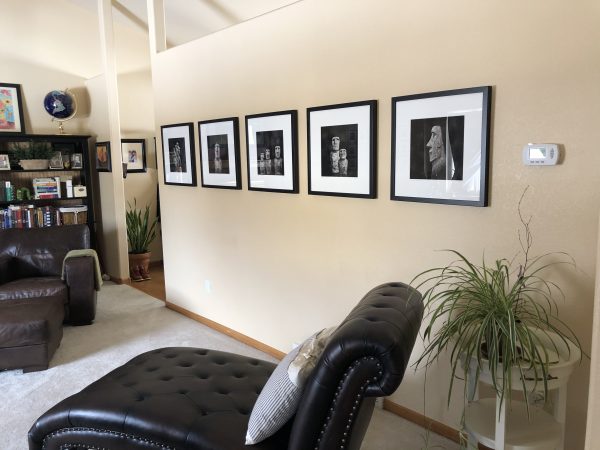
My Moai portraits on a my friend’s wall (Finn Kingman)
I’ve received some requests to explain my simple approach to matting and framing. I like things simple, but I also like quality, efficiency and cost effectiveness.
Sending your work to a framer will produce high quality work, but it can be expensive. Matting and framing yourself can be time consuming and if it’s not done perfectly, can detract from your art. My goal is to make the matting and framing process simple, professional and cost effective.
There are many different ways to matte and frame, some of it’s a matter of taste and preference, and so here’s how I do it.
Matting:
To keep things simple, I only offer four sizes of matted prints:
- Horizontal 8×12 matted to 16×20
- Horizontal 10×15 matted to 20×24
- Square 8×8 matted to 16×16
- Square 12×12 matted to 20×20
Initially I offered any size print and then would hand cut each matte to order; but this was slow and tedious work that I didn’t enjoy doing. By standardizing on these four sizes I was able to streamline my process and bring my costs down.
One way I brought my costs down was to obtain a resale license which allowed me to open an account with an art supply distributor. Now I purchase my materials in bulk for the best prices, for example I purchase a case of matte board and backer board.
I then have my framer bulk cut the windowed mattes for these four sizes. He has a computer controlled matte cutter and therefore every window is perfect every matte looks professional. Cutting the matte windows by hand is time consuming and they never looked quite as good as those cut by the computer.
By having them cut in bulk I get a discount and always have inventory on hand.
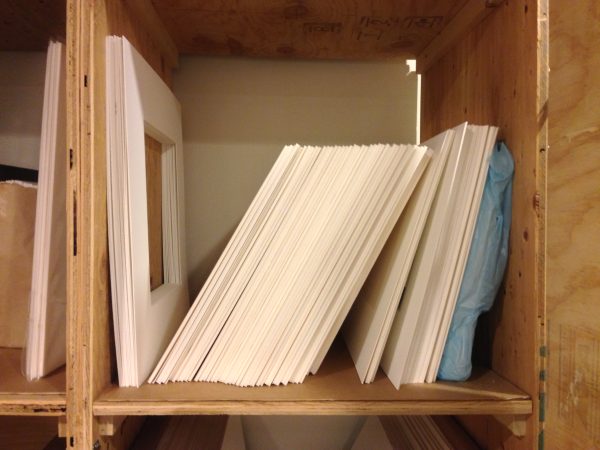
My inventory of pre-cut mattes and backer boards
When I need to matte a print all I do is assemble them using my print, the pre-cut matte, a pre-cut backer board and two pieces of archival tape. With this system it takes me only 10 minutes to have a print ready to ship.
Here is how my matting system works: the print is “hung” from the back of the matte (not the backer board) with one small piece of tape. This is a very simple and secure method of attaching the print and it allows the print to hang distortion free.
To mount the print, I lay it face down and position a 6″ piece of tape along the top center edge with half of it on the print and half off the print. And here’s an important step: I stick the tape down at one end and from that point I slowly press the tape down along the six inches, allowing the tape to position itself stress free. This ensures that the tape is not warped and will not warp the print.
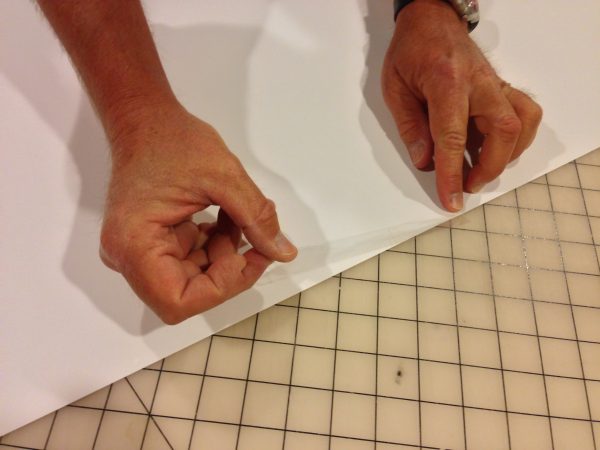
Positioning a 6″ piece of tape on the top backside of the print
IMPORTANT: I do not stick the tape to the print at both ends and then press it down towards the center. This can warp the tape which will end up warping the print. This sounds like such a small and silly point, but if its done the wrong way it will distort the print (especially glossy prints) and will look terrible.
Now I put the print face up with the sticky side of the tape facing up. I properly position the matte over the print and then affix them together by pressing down along the top of the matte.
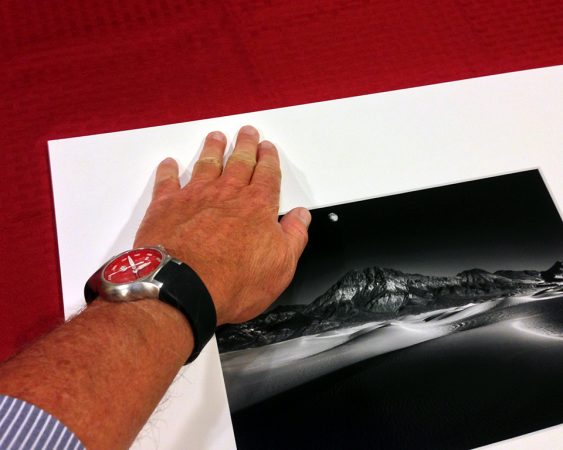
Pressing down on the front of the matte to affix the taped print to it
My print is now attached to the matte by a single piece of tape. It’s secure and it allows the print to lay flat and undistorted.
Next I attach the matte board to the backer board by taping them together with a single piece of tape. I lay the matted print face down, butt the backer board to the top edge and tape the joint together. This piece of tape now acts like a simple hinge.
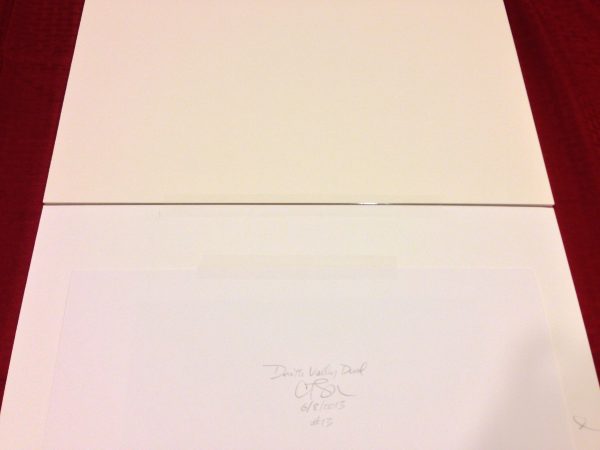
This shows how the print is taped to the matte board, and the matte board is taped to the backer board
Now fold the backer board and matte in half.
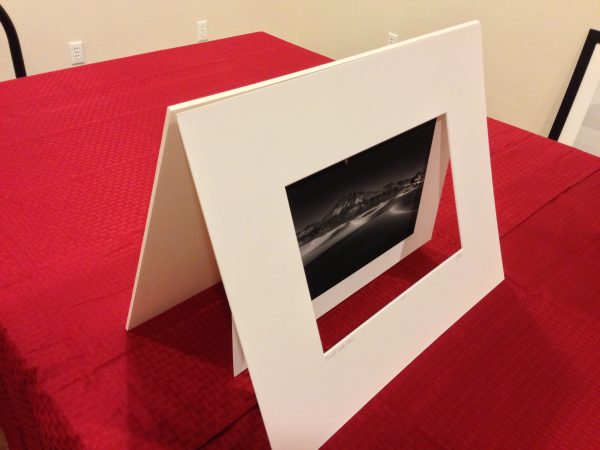
This gives you an idea of how the entire system works: the matte and backer board hinged at the top, and the print hanging from the matte by a single piece of tape
I then attach a business card to the back with double sided archival tape.
My business card goes on the back of every print
Finally I put the matted print into a clear bag to protect the print, but it also has another benefit: it acts like a piece of glass and makes the blacks on my matted prints look really good. I want my print to make a good first impression when the customer opens the box!
Caution: there are two types of adhesive bags available. The CORRECT type has the adhesive on the bag, the WRONG type has the adhesive on the flap.
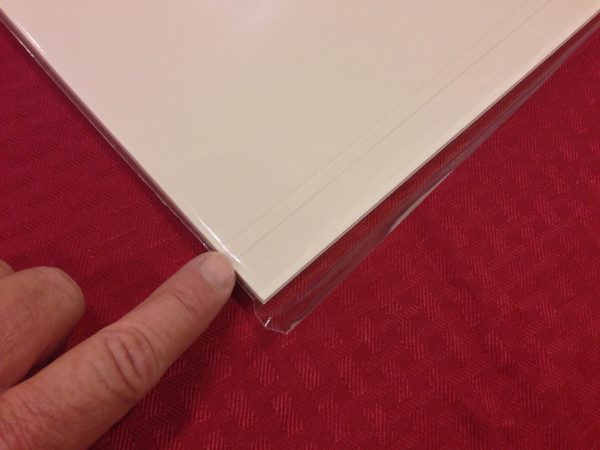
Notice the the adhesive is on the bag, not on the flap. This is the Clear Bag that you want to use.
Please do not make the mistake that I made and purchase the bag with the adhesive on the flap, because it will ruin your print. You will get the print into the bag safely enough because the protector strip is over the adhesive, but when you or the buyer takes the print out, the exposed glue on the flap will touch the print and ruin it.
You now have a simple, classy and perfectly presented print.
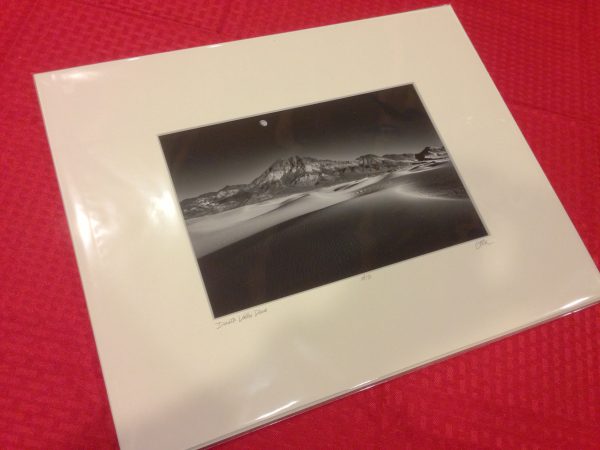
The final product.
Framing:
This is going to be a very short discussion: after many years of offering framed prints to my buyers, I have concluded that the best way to frame a print…is to have the buyer to do it themselves! Seriously, framing takes a lot of time, there is little profit in it and choosing a frame is a matter of taste, which is best left to the buyer.
A Couple of Other Tips That Might Be Useful:
Overmatting Vs. Undermatting: I like the look of an over-matte with the signature on the matte board, but it’s a matter of personal taste. There is one legitimate criticism people raise about over-matting: if the matte is ever damaged and replaced, the artist’s signature will be lost. How I get around this is to also sign the print so that if the buyer does need to re-matte, they can under-matte and reveal the signature on the print.
Signature: I sign with a fine point mechanical pencil on the front of the print, the back of the print and the matte.
Print Surface: I generally use a matte surface because I like how it looks, but there’s another advantage: it’s non-reflective surface hides print warping. When I do use a glossy paper, I use a heavy weight stock to minimize this warping.
Archival Materials: I use archival matte board, backer board, tape, double-sided tape and clear bag. Yes, I could save money by using cheaper materials, but they will eventually cause damage to the the print and this will reflect poorly on me and my work.
Standard Sizes Means Standard Crops: Using standard sizes for my prints means that I generally do not use odd crop sizes. If I do, such as with my Clouds panorama below, then I’ll not offer a matte for those prints, but sell them as a “Print Only.” Cutting special mattes for a few prints is a lot of work.


Dust: dust is my number one enemy when matting and framing! One of the most common mistakes that I see people make is to matte and frame on a piece of carpet. Carpet is one of the worlds best dust magnets and so why would I collect all of the dust and pet hair in the room and concentrate it right where I’m working?
I work on a large plastic cutting sheet that I purchase from a fabric store, and then I use a drafting brush to keep it clean. This works extremely well and I have five cats and two dogs in the house.
Materials:
- Matte Board: I use Crescent 2253 white (32X40 size) and Crescent 2262 white (40X60). Both are the same off-white color, but Crescent uses different part numbers for the different size boards.
- Backer Board: I use Elmer’s 3/16 Acid Free foam core.
- Archival Tape – The tape I use to affix the print to the matte and to create my hinge is Framer’s Tape II from Specialty Tapes.
- Double Sided Tape – 3M ATG-700
- Clear Bags can be purchased at: http://www.clearbags.com/bags/clear-bags (get the adhesive on the bag, not the flap!!!)
When a buyer opens the box and sees my print for the first time, I want them to be impressed. I want the matting and presentation to be simple and professional so that it doesn’t distract from the image.
My system accomplishes this.
Cole

There’s a $150.00 dollar (at least) 4 hour Saturday morning workshop on matting, framing, and merchandising. Thanks one more time, Cole, for being so generous and gracious. Bravo. Bravo.
Great info Cole, thank you for sharing
Best most helpful article on matting and framing ever! One of the areas I have been struggling to figure out..and all the little tips from you have helped a lot! Thanks, Cole!
PS. I love your work..it’s awesome!
Wonderfully helpful information, thanks Cole!
thanks Cole. Much appreciated.
Simplicity pervades everything you do.
Yes, matting and framing can make or break the appearance of a beautiful print depending on how it was done. Your information as usual is very helpful. Thanks for this most useful post.
Lets cut to the chase, what is that watch you’re wearing? I’m a watch fan… NEED to know. 🙂
Great tutorial, lots of in-depth information and very well explained. I liked the accompanied photos, but did they have to be in color? LOL!
John, Luminox watch!
Gordon, color images thanks to my iPhone.
Great article and helpful. I was wondering what paper you use for the matte prints &also your glossy prints.
Thank Ian. I use Hahnemuhle Photo Rag 308 for my matte paper and Epson Exhibition Fiber for my glossy.
I’m not sure exactly why but this weblog is loading very slow for me. Is anyone else having this problem or is it a problem on my end? I’ll check
back later and see if the problem still exists.
Great information Cole and very timely. I have been struggling with matting and framing prints for a contest at Ohio State Fair next month. I printed 18×12 B&W with Epson 3880 on Epson exibition fiber paper and hung it to the matte after three days drying but it is still wavy. I use two strips artist tape about two inches from top ends. I think EFP is a great paper but very fragile. What papers do you use?
Bill, this is very odd. My prints have LOTS of ink on them, and they are never wet or warped at all, and I use Exhibition Fiber also. I wonder if it’s the humidity difference between Ohio (high) and Colorado (very low)? My prints are dry and flat coming right off the printer, zero dry time needed.
I’m assuming your room is not air conditioned which would dehumidify the air?
That’s one of the problems with glossy surfaces, you get that reflection that shows every imperfection, and you get two reflections; one off the glass and another off the print.
Thanks for the heads up on the paper Cole, may I also ask if you print through the Epson Advanced Black and White Driver or do you print through an ICC profile and let photoshop manage the colors
Thanks very much for that information, Cole. I’ve just started selling some prints and I was very confused about the best way to present them. You’ve cleared that up for me! Cheers!
Yes Ian, I am using Epson’s advanced black-and-white mode. I choose the paper that’s the closest match and I’ve never felt the need to get my paper profile.
This is a terrific tutorial, Cole. Thank you! One question I have has to do with positioning the mat on the photo. When I have the photo face up with the sticky side of the tape face up, I keep getting stuck to the tape before the mat is lined up properly. Do you have any suggestions?
Dave, thanks for the question. I am having my studio tour right now and just printed and matted a print for a friend while she waited. I never remember having that problem and so I paid attention as I did that step.
What I found myself doing is holding the matte just above the print as I positioned it, just about 1/4 of an inch above. Then I placed it down in position and secured the tape.
Probably just a small amount of trial and error to it. Let me know how it goes!
Cole
Wonderful article Cole. Thank you for taking the time to put this together……..
Very useful tutorial.
I’ve heard people talk of ‘out-gassing’ (let the jokes begin) and that there should be sometime left between printing and framing. Any concerns or issues with this when putting the print in a bag?
Andy, I will TRY to answer your question about “out-gassing” in a serious manner!
Yes, out-gassing is a problem with glossy prints, but not matte prints. The inks on a glossy print release some sort of ink solvent as they dry and can create a film on the back of the bag which creates a faint daguerreotype image (it’s kind of fascinating!)
It’s not really a problem on the bag, but can be a big problem if you frame the print too early because you’ll later have to disassemble the frame and clean the glass.
Only time seems to take care of the out-gassing and we have all experimented with methods to speed up the out-gassing process including my proceedure of interleaving the prints with Kraft paper and letting the sit for a week. In a pinch I’ve even “baked” the prints in the oven on low!
This is another reason Why I like matte papers which do not suffer this fate!
Thank you for this very clear presentation.
Any comment on the “box” for shipping?
Like framing, packaging for shipping is best done by someone else. I use a UPS store because I all I have to do is drop it off and magically the print is shipped!
They use a box that is about 4″ larger than the print and bubble-wrap it. When you receive a lot of deliveries, you come to hate “peanuts” and so I try to avoid them.
Another advantage of using a UPS Store is that they take care of everything if a package is damaged in shipment. It doesn’t happen often, but once you’ve had to file a claim with UPS, you never want to do it again.
Time is more important to me than everything else and thats why use a shipping service.
Thanks.. That does make sense.
keep it simple.
Thanks for the tips Cole. I used your method to mat and frame a few prints the other day and it worked very nicely. I particularly liked the suggestion you made for the clear bags. I just received a package of them and they are perfect. I always wondered where the folks at shows got those bags. I never asked anyone because I felt weird asking some one where they got the bags from while not buying any of their work.
Wow! perfect timing and information! Very generous of you to post this.
I could see it being sold as an ebook or something like that
Cole… How do you ship the print to the customer. Do you use some form of flat box
Cole, Can you make a recommendation on a company for mat cutting?
Re: print positioning and avoiding sticky tape, I usually hold the print upside down over a lightbox, then press.