May 23, 2017
Before and After – The Jim Bridger Power Plant
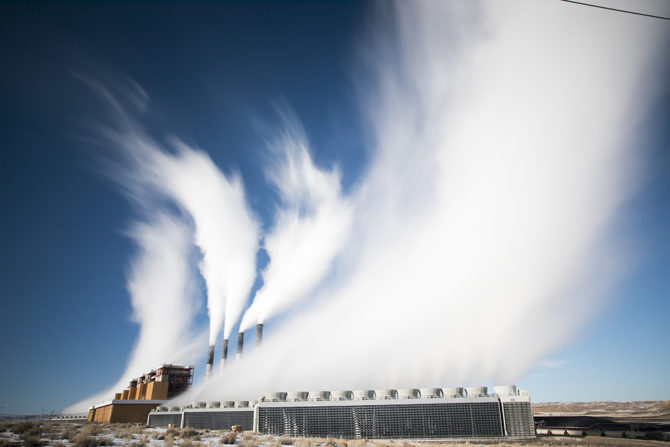
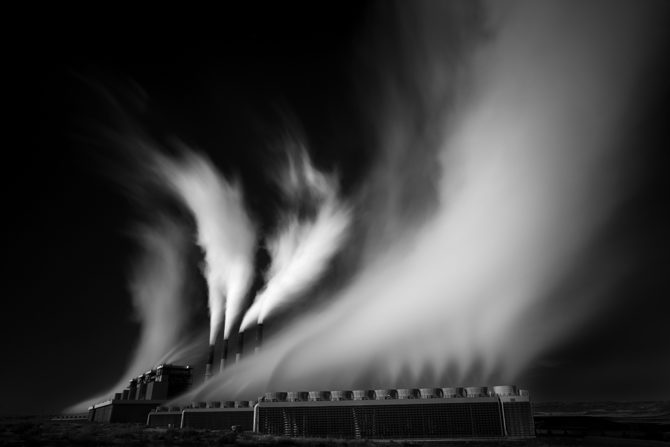

This is a “before and after” of the Jim Bridger Power Plant that I created recently.
The before does not differ a great deal from the after, but there are a few differences. Can you spot them?
Hint: the first change is abbreviated b&w.
I like to use the word “create” rather than “capture” when talking about my images.
Why?
Because a “capture” implies that the image is an accurate representation of reality, as the scene appeared to the camera and eye.
I like “create” because it suggests that the image is not accurate, but rather it has been created through my Vision into something new and different.
And when did the “Vision” for this image occur?
When I first saw this power plant from I-80 from several miles away. As soon as I saw it, the Vision of the final image appeared in my head and guided how I shot it, how I exposed it and how I processed it.
Vision was the driving force.
Why am I always mentioning Vision? Because it breaks my heart to see people chasing equipment, technique and gadgets…thinking that these things are key to creating a great image. Those things can certainly be “elements” of a great image, but not key and not even always necessary.
So please, focus on your Vision! I spent most of my photographic life pursuing the wrong things and was lucky to have a mentor who was even more bull-headed than I am, and argued that I did not need document, but rather I could create.
Thank you Vered.
Cole
I fell in love with this image when you originally put it on your blog so it is very interesting to see the original photograph and how your vision made the final piece of art. Vision is the essential component in every successful piece of art. All the techno stuff like cameras, lenses, software are just the tools.
I liked the b&w version, but I like the color just as much! Differences: 1) took out the cable at the top right; 2) darkened the white rectangular things at the bottom right; 3) darkened the grey areas at the bottom right side of the white plumes of smoke to give them more contrast from the white. Am I right and what did I miss?
absolutely stunning gorgeous image!!
Cole, I love the b&w conversion, and the way you brought out the light and shadow play, adding drama and a gloomy, somewhat sinister (to me) feel to it. I very much relate to the process you describe – seeing a “scene” and having a vision of an image that I can create to express the feeling/perception I got.
While often I see it in b&w (like the leaves I posted recently, seen in a prosaic patch next to some stairs by a sidewalk in NYC), other times I see it in color. For instance, when I see I bright, cloudless sunny day, I immediately think, today I’m going to make very nice b&w images, but on a cloudier day with softer light, I appreciate more the colors and their nuances. I have recently made some long exposure images of downtown Manhattan, both in color and b&w, and I must say the color version somehow pleases me more.
I totally agree with your emphasis on vision and not on equipment , although one must have a minimum quality camera to capture long exposures, as well as tripod, etc… I often quip with friends who, wanting to make a compliment, say things like “great photo, you must have a really great camera”. My reply is, “when you eat a really nice meal, do you tell the cook that s/he must have really great pots, pans, stove and/or oven?”.
I’m not sure where this misconception comes from, perhaps because of the ubiquity of cameras and how “easy” it may seem that anybody can take a photo. It takes a while to realize the difference between “taking a photo” and “creating an image”.
Btw, my favorite images you have posted recently are the sand dunes…
You are welcome dear Cole! The quality of your work, their sensitivity and beauty is the best thank you I can get!!!! Thank you Cole
Don’t care for the image – you didn’t follow the rule of thirds. (big smile)